Sunday, 16 June 2013

Essex Way Part 2

Essex Way part 2
In one of my previous blogs I walked part of the Essex Way from Harwich to Manningtree, this week I decided to do a little bit more, this time from Mistley to West Bergholt, a distance along the way of just over 27 KM, which given the not overly excessive speed I walk at would take me a little over five and a half hours to complete, six with a break. I would once again be using the "runchecker" app to keep track of my progress, which having learned from previous experience I`d reprogrammed to give me information about my progress every 45 minutes rather than every 5 and to give info in metric rather than imperial (UK Ordnance Survey maps use kilometre grid squares) as well pausing when I stopped, this feature ended up becoming a little annoying as it would register a pause every time I went through a gate. none of this however stopped the condescending tone, at least in my mind, the app uses whenever your averages drop.
          I set out at just after 8am with an overcast skies and a slight chance of rain, although small Mistley does have a dark place in history as it was once the home of the notorious (and self appointed) Witchfinder General, Matthew Hopkins, who during the 17th century owned the Thorn Hotel where in the basement he extracted "confessions" from women accused of witchcraft, usually using torture methods to do so, thankfully his reign of terror was short lived and in an ironic twist (at least in one story) Hopkins himself was accused, tried and executed as a witch,
The Thorn


a little further down the road are the Adams towers, these were once the towers to the parish church and are all that remains, the centre section was demolished in the 19th century when the church on new road was built.

 Adams Towers


within a few metres of the Adams towers the road known as The Walls begins, the route follows this road all the way along into Manningtree and has some good views over the estuary.

The Walls


Manningtree is England`s smallest Parish and yet it has a lot packed into the area along with a high street that, with one notable exception, is without the usual chain shops that would normally be found along it. the Essex Way follows the back streets of the town gradually rising until it meets with Coxs hill just outside the town. it was on this road where I had an unusual encounter, a dog was running up and down causing the traffic all sorts of problems, assuming the dog belonged to me one of the drivers wound down his window and proceeded to address me about the dog with the words "I say, would you mind awfully putting your dog on a lead?"...or words to that affect, to which I replied "I do beg your pardon sir, but you seem to be mistaken about the owenership of this dog and I suggest you direct you comments elsewhere"...or words to that effect, ( I did eventually come across the dogs owner later) after this the walk drops down into Dedham Vale and makes its way into Dedham itself.
 Dedham Vale

Dedham Vale


     Dedham Church


once again the Essex way makes its way towards the River Stour and the furthest North that the route goes, if it did further North it would end up in Suffolk, the route follows the river for a couple of Kilometres and got me thinking, maybe it would be nice to canoe down it one day...

River Stour
River Stour (the opposite bank is Suffolk)

after a few more kilometres of following the path I reached the village of Boxted, where I found an unusual addition to the Essex countryside, an Australian gum tree, which I considered a little odd but not as odd as something I would find later on with my walk.


gum tree


between Boxted and Colchester is fairly open and easy ground to walk through it was while walking through some of this ground that I came across the possibly the oddest thing of the walk, a vineyard, someone is seriously trying to grow grapes in Essex!


the route after this follows minor roads and tracks to Great Horkesley, after nearly 25 kilometres both my knee and hip had started hurting, fortunately West Bergholt was just two kilometres away along some easy paths and gently rolling hills, unfortunately because of the pain I was in my pace had dropped drastically and just to add insult to injury "runchecker" pinged on to tell me that as well, so rather than being 25 minutes away it took nearly 45 minutes to walk the final 2 km.
            this walk had taken its tole on me in the end but I would still recommend the Essex Way as a good introductory to long distance walking.

Follow the link below to go to the Lone Wolf Mobile Bushcraft website.


Saturday, 8 June 2013

Hydration sacks (Platypus vs. Camelbak vs. Source vs. Osprey)

Hydration sacks
(Platypus vs. Camelbak vs. Source vs. Osprey)
          Its amazing to think that until about 15 years ago hydration sacks simply didn't exist, it was just plastic bottles or metal Sigg bottles and at the time we didn't think anything more of it,

          Then along came Platypus and Camelbak and changed everything, at the time I was working in a local camping shop and thought that not only was the idea revolutionary but was quite simply the best thing I`d ever seen, the ability to drink whilst on the go, I was so enthralled by the idea that I bought one straight away, the Platypus 2 litre and whilst it changed everything it did have its drawbacks, as with the first generation of most equipment, some of which have been addressed and others that haven't. after this I moved onto the Camelbak 2 litre and then the Source 2 litre, I`m currently using the Osprey Hydraulic system which is incredibly similar to the Camelbak, each of the sack has its own unique advantages and disadvantages as well as universal advantages and disadvantages which I will describe below.
universal advantages  
          The biggest universal advantage of the hydration sack is first and foremost the ability to drink whilst on the move meaning a decreased risk of dehydration and the associated risks it comes with, especially the "I cant be bothered to stop and take my rucksack off" mentality (we`ve all been guilty of that one!). most rucksacks are now equipped with a specific pocket for them. They pack up smaller than a standard water bottle, they come in a variety of sizes usually from half a litre to 3 litres which is bigger than most standard bottles and they can be used as an emergency splint! (I did this on a wilderness first aid course and impressed the trainers, who I`m pretty sure nicked the idea afterwards and patented an air splint based on the idea....)
universal disadvantages
          Whilst the ability the drink whilst on the go is a massive advantage the one disadvantage to this system is that you have no idea how much you`ve drunk until you empty the bottle, unless you take your bag off of course, its for this reason that I always recommend to everyone that if you do go for a hydration sack then you should consider buying a normal drinks bottle as well, better safe than sorry, another disadvantage to hydration systems is that they may not be as tough as some of the metal bottles either, how many of us have a huge dent in a classic Sigg bottle? another disadvantage to the hydration system is the maintenance involved with them, with a standard bottle the most that needs to be done is it tipped upside down left over night to drain and stored overnight with the lid very loosely done up, purely so its not lost of course, with a hydration sack care needs to be taken to make sure that its completely drained of water, the pipe is empty and dry and that the whole system properly aired out else mould forms on the inside, personal experience speaking there! the other irritation caused by these bags is clients on seeing the pipe coming out of the bag asking you if its an oxygen tank and why they don't have one! 
Platypus  

this was the first system I used and at the time I was really impressed, it made perfect sense to have something to drink from as I walked along and I would still recommend this bag to anyone, the plastic used is tougher than most of the others meaning it can stand a little rougher handling making the bag ideal for first time users providing the disadvantage of this bag are kept in mind, in the case of the hoser the pipe is difficult to clean out and it can be difficult to fill up, as I found out to my cost if the pipe isn't properly cleaned out it can become very mouldy but as the one I had was a first generation I`m sure Platypus has fixed this problem. the bags also come in 0.5 litre, 1 litre, 1.5 litre, 1.8 litre (rare), 2 litre and 3 litre versions.
Camelbak

          Camelbak make many different types of water bottles including standard bottles, filtered bottles, insulated hydration sacks, standard hydration sacks (which they call bladders), sacks with wider openings (big zip) and colourful ones for kids and helpfully a cleaning and drying system (sold separately), the first thing that grabbed me about the Camelbak was the realativly huge opening to fill it up with as well as the easy close lid, the softer plastic of the bag and the pipe made this easier to pack and also nicer to bite on, the other thing I found with Camelbak is the faster flow rate of the water, greater flow rate however means that I was emptying the system quicker, which is when I decided that I needed to start carrying a spare water bottle, the other good thing with Camelbak is the pipe itself detaches for easier cleaning, the disadvantage to the Camelbak is unless you use the big zip it can be difficult to get rid of all the water afterwards. the Camelbaks come not only in different sizes ranging from 1 litre to 3 litres but in so many different varieties and in some cases in their own bags designed for running. 
Source
          Possibly the best hydration system I have used and would absolutely recommend this system to anyone over the others and for many good reason, most of the systems have a tap on the pipe to prevent any accidental leaking, the opening to fill up is the full width of the bag, the flow rate is excellent and the plastic used is tougher than most, the pipe comes off for easy cleaning and the bag can be propped open to air out without using any specialist equipment, I usually use a stick to do this, the only disadvantage to the source system is filling it up can be awkward, the big orange fastener needs to be slid off and put somewhere safe, the top unfolded, the bag filled, top folded over and the orange fastener replaced which can lead to some spillage, again personal experience. they come in the standard sizes from 1 to 3 litres. these bags can be expensive but are worth the money.
Osprey
          The bag I currently own, so why did I get this bag, quite simple it was half price when I bought my Osprey bag, how does it compare to the others? well the flow rate from the (non detachable) pipe is good but no tap, big cap which is easy to get at with gloved hands and easy to fill but the position of the opening does make it difficult to empty out, the plastic is thin but surprisingly tough, the carry handle across the whole bag makes this bag really easy to carry, obviously, but does prevent the bag from being rolled up, the one thing I really did like about this bag was the magnet it came with rather than a clip to attach to the shoulder strap, which I then promptly lost, fail. this doesn't make the bag any less effective though and is still recommended as are all the other bags in this blog.
A hydration system is certainly more effective than a water bottle and providing limitations are remembered they will quite quickly become a regular feature in your equipment.
 As with all outdoor equipment personal preference is key to any decision you make.

Follow the link below to go to the Lone Wolf Mobile Bushcraft website.
www.lwbcfs.com


Sunday, 2 June 2013

My Equipment

My Equipment
I`ve mentioned in previous blogs that I do have personal preferences when it comes to outdoor equipment, those preferences being Arc`teryx, Mountain Hardwear and Mountain Equipment. however due to financial and other restrictions or preferences I haven't always been able to get the equipment that I've wanted but I`ve always bought the best that I could afford at the time and never compromised on the two most important things, boots and rucksacks. The equipment I have now is well used and starting to show its age (those pieces I haven`t replaced recently anyway) but is still serviceable and because I maintain them should provide a few more years service yet. because I've recently done a blog about my new tent and sleeping bag I wont mention them here
Boots
Salomon are my preferred summer boot company as the fit is perfect for my feet, I`ve had these about four years now and they are coming to the end of there serviceable life and i`ll be looking to replace them in the near future, being a mid boot they are perfect for the majority of the work I do, be it scrambling over high ropes cables, walking the Brecon Beacons or a gentle stroll along the Essex way, they are more flexible and easier to wear than a full boot but provide more ankle protection and security than a cross terrain shoe, the only issue I have with them, and it is a personal thing not a fault with the boots, is being Gore-Tex lined I find that my feet get too hot in them and I have at the end of the day had steam coming out of them, if Salomon start making boots with eVent then I will probably end up buying a pair however this may be unlikely in the near future.


La Sportiva are the boots that I use for winter along with Grivel crampons, however these are probably going to be replaced soon as they have become uncomfortable recently, no idea why though  
Rucksacks (yes plural)
In the number of years I`ve been doing outdoor education I ended up with more rucksacks than I really needed, that's the hoarder in me, I always justified this with the phrase "its nice to have a choice" however when the choice included the following it did become a bit overwhelming, a Lowe Alpine Pax 25, Berghaus freeflow 2 35, Gregory Advent Pro, Crux AK47 (yes that's really its name!), Lowe Alpine Appalachian 55+15. this has now been slimed down as both the Lowe Alpines have gone, one kept by my ex-girlfriend the other being left behind during a house move, these have been replaced by the Osprey Flare for every day use and Black Alpine 65+5 which I bought when I was short of money to replace the Lowe Alpine, however this bag may have an accident very soon....
          The Berghaus has also gone as I really couldn`t justify having two 35 litre bags and because of the design of the older freeflow system, it ended up developing a creak as I walked along, the advantage of the design was and still is the way it allows air to flow around the back but I really couldn`t put up with the creaking which is why I chose the Gregory, the other reason was the technology that goes into the bag, the primary one being the way the bag self seals small rips in the fabric the other one being the way the bag can be made to hug the back perfectly another reason is the way is the way that any excess room can be taken right down to nothing thanks to the draw cords, I still have the Crux as I do like the simplicity of the design, the ruggedness of the fabric and the fixed harness which fits me well.
Osprey Flare

Gregory Advent Pro

 Crux AK47

 Blacks Alpine 65+5
Waterproofs
my waterproof jacket is an old Arc`teryx Theta jacket lined with Gore-Tex XCR, welded seams, waterproof zips, stiffened peak hood which is helmet compatible and adjustable and an excellent fit, being an older jacket it doesn`t benefit from the newer Gore-Tex Pro shell so isn`t as breathable but I haven't noticed anything wrong with this personally. the trousers are from Mountain Equipment and have been used just as much as the jacket and are starting to show there age now, they are still however waterproof, not sure what material is used though, what I do like about these is the full length dual zips which have proved their value more than once, the snow gaiters round the ankles and the height they come up to which combined with the jacket and the boots let no water in whatsoever.
Arc`teryx Jacket
Mountain Equipment trousers

Insulation layers
I use several different insulation layers depending on the activity I'm doing, these include an Icebreaker 260 made from merino wool, is long past its best, full of repaired holes and has shrunk but is still serviceable, the thing I like about this piece of clothing is the way it works, is naturally anti bacterial (unofficial record is 200 days in the Antarctic without washing and it didn`t smell!), cool when its warm and warm when its cool, naturally wicking and even when its tatty it still looks good, a long pile fleece which keeps cold or snow away whilst keeping the under layer dry,  and a Vanguard jacket, which is a copy of the legendary sungpak softie, this too has been patched up through the years but is still going strong, I've also got a down jacket which I picked up cheaply at an army surplus but I rarely use it.
Vanguard jacket
 long pile fleece
Icebreaker 260 (I wasn`t actually part of Icebreaker Test Team)
Cheap down jacket

Base layer
depending on the situation will depend on the base layer I wear, the two base layers I own are a basic Mountain Hardwear technical T shirt and the Icebreaker 190, I favour the Mountain Hardwear in the warmer climates and the Icebreaker in the colder.
Mountain Hardwear technical T-shirt


Hats and gloves

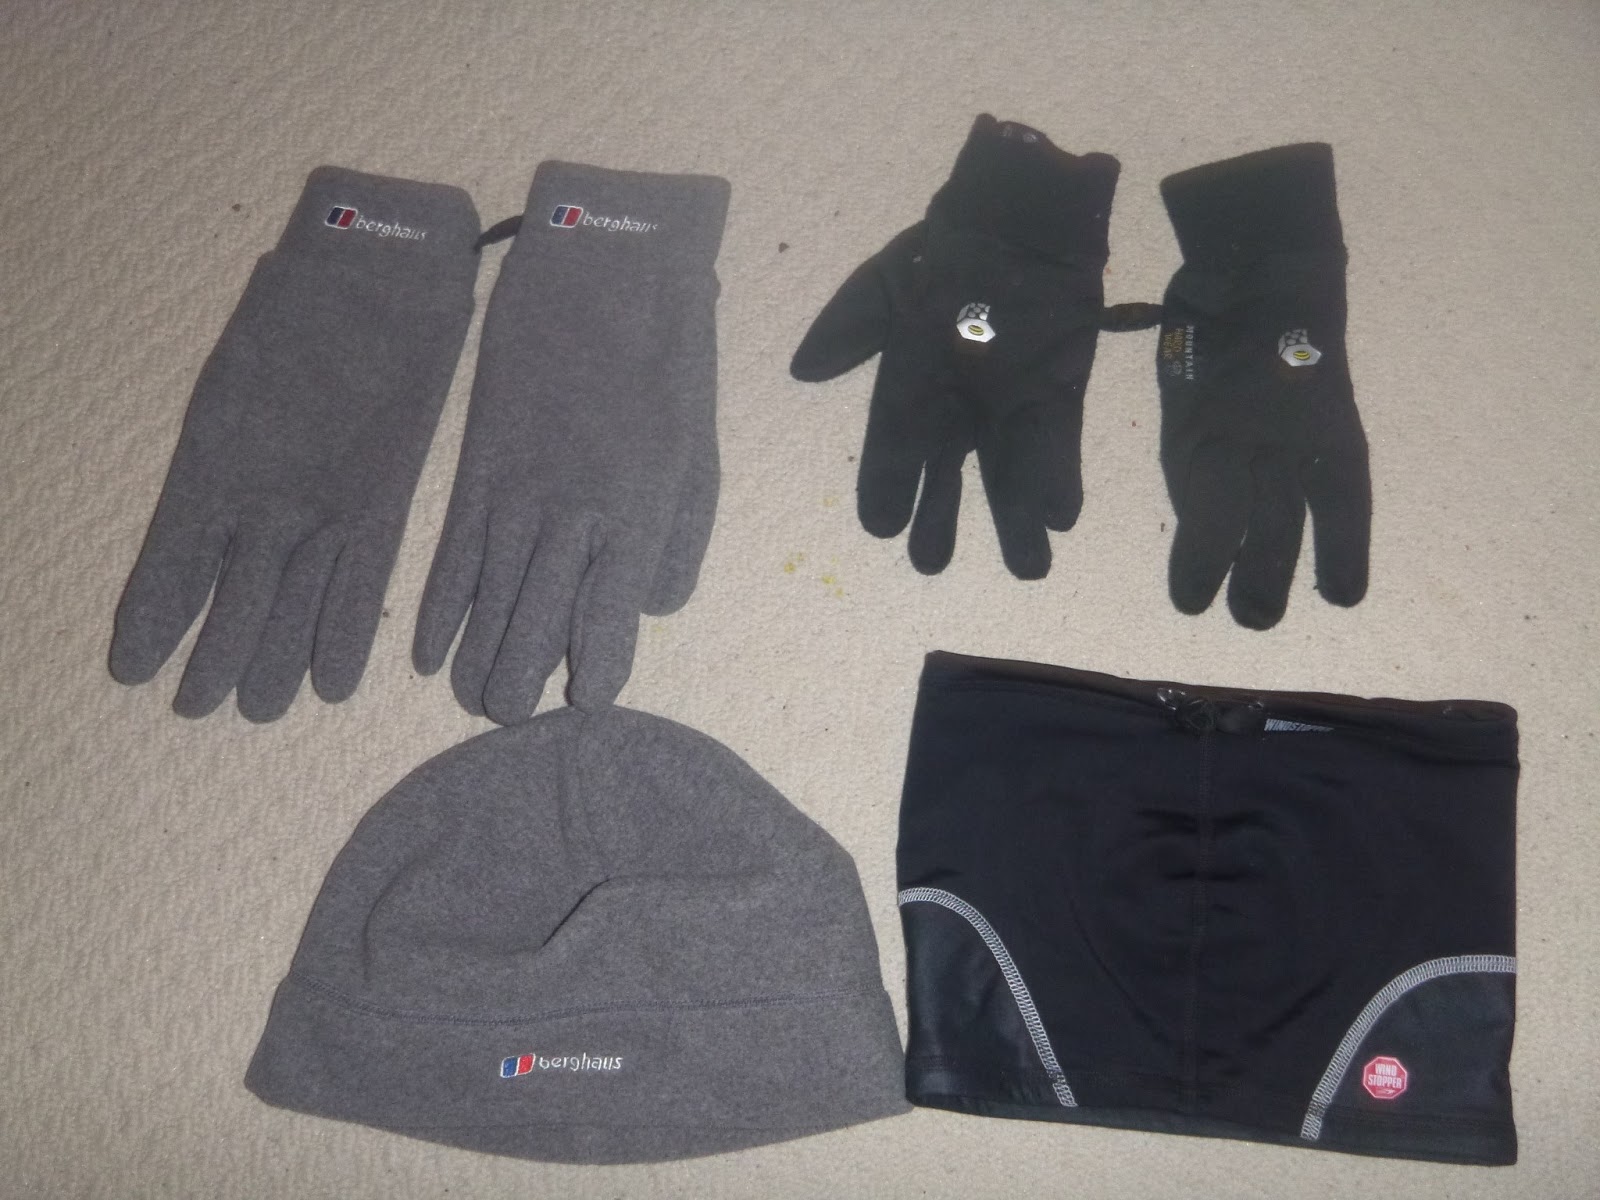
this is an area where conversely I will actually spend as little as possible and I have a very good reason for this, I always seem to end up losing my hats and gloves, the worst time this happened was right after i had treated myself to an Arc`teryx beanie hat in the Lake District, a few hours later I was waving it goodbye watching it fly away into the valley from the top of Blencathra, from then on I decided it would be a bad idea to buy anymore expensive hats or gloves and have stuck to Peter Storm ones since, the only exception is when I have gained them through other means, such as the Berghaus set I got through work.
cheap hat and gloves

other hats and gloves I've acquired

Stoves, (yes plural again)

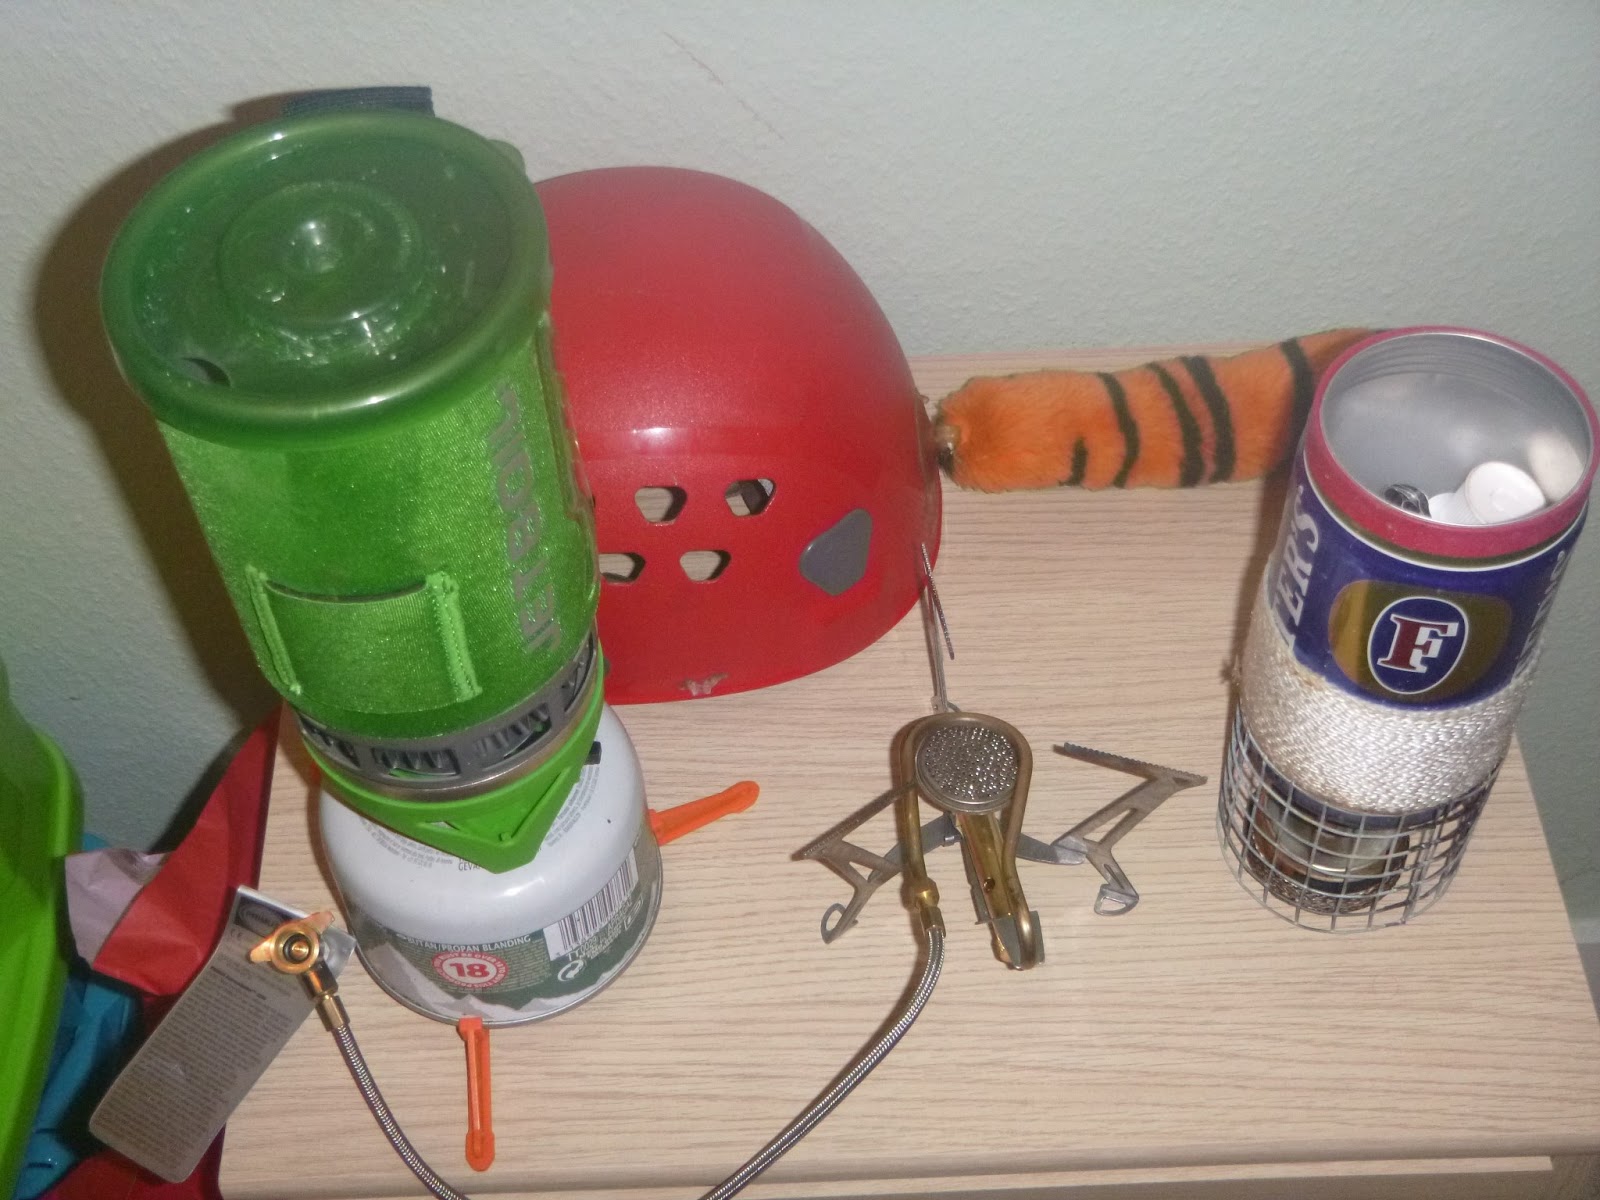
           I've used several stoves over the years that I have been doing outdoor ed ranging from top of the range multi fuel stoves (Primus Omni Fuel) through gas stoves of all types including the venerable old camping gaz C206 stoves and the classic Trangia, which I've written a blog on previously, the four I currently own all run off gas or meths and are the Jet-Boil Flash, Primus ExpressSpider, a professionally made lightweight meths stove and a homemade meths fired stove (which I call a toucan stove as it is made from 2 drinks cans), despite the limitations of the Jet-boil it is still a very good stove, the limitations of the Jet-Boil include the size of the pot itself which is only just over 1/2 a litre, although the Sumo is bigger and Jet-Boil also produce a pot that fits directly on the stove as well as a ring to use with any standard pot, however using the ring and standard pot does mean losing the famed efficiency of the system, it is also a very tall system which increases the likelihood of the whole thing tipping over but Jet-Boil have addressed this situation by including a tripod with all their systems.
          the ExpressSpider is a basic gas stove from Primus without an electric lighter or much of anything else really but it is incredibly lightweight, easy to pack and runs off the same type of cartridges as the Jet-Boil, the other advantage of this stove over the Jet-boil is its lower centre of gravity making this a relatively safer stove.
          the two meths fired stoves work in the same way and are built in a similar fashion, the difference being one is professionally made in America and uses parts readily available whereas the other is home made by me and has taken a lot of trial and error to get it working, the good thing with these two stoves is that they weigh almost nothing and if built properly (or Bought) they can be amazingly quick and efficient, they can be built with limited tools and experience (check youtube for penny stoves) and are cheap to make.
          the only stove i don't currently own is a multi-fuel stove and the reason for this is quite simple I've never had the need to own one, I've always managed to borrow one from friends i can however see this changing at some point and have been looking at the options and the one that has caught my attention has been the Primus Omni-fuel chiefly because of its flexibility in fuel options.
     
Jet-Boil flash, Primus ExpressSpider and professionally made lightweight meths stove, I couldn't find my homemade stove

Accessories and Gadgets

          What I have collected over the years is plenty of accessories and gadgets ranging from ones that I use everyday to ones that rarely see the light of day, these include a self inflating pillow through a `Power Monkey Explorer` emergency charger to the usual things such as pen knives and compasses.
self inflating pillow and mattress
 head torches both Petzl
 folding mug
 northern (left) and southern (right) hemisphere compasses (spot the problem with the southern hemisphere compass)
other accessories I own, Gorilla Pod, Victorinox forester penknife, fire striker, spork, and Vango eye light   
This is just an example of some of the equipment I own, as I said above although I have my personal preferences when it comes to equipment and I am a gear snob at heart I also don't have an unlimited budget and buy within this budget and upgrade when I can, which as you can see can lead to some interesting combinations.

As with all outdoor equipment personal preference is key to any decision you make.

Follow the link below to go to the Lone Wolf Mobile Bushcraft website.
www.lwbcfs.com


Sunday, 26 May 2013

The Essex Way

The Essex Way,


No this blog has nothing to do with that c**p TV show or a new diet regime but the long distance footpath running for 81 miles from Epping on the outskirts of London to Harwich on the mouth of the Stour river, the initial plan this week was to walk the whole of the route but due to unforeseen circumstances I was only able to do a small section, in this case Harwich to Manningtree, a distance of about 12 miles or 20 kilometres.
          Because the route was established in the 1970s when car ownership was still relatively low the route was established around the availability of good public transport (remember that?!) which is why the route starts at Epping tube station and  finishes opposite Harwich town railway station.
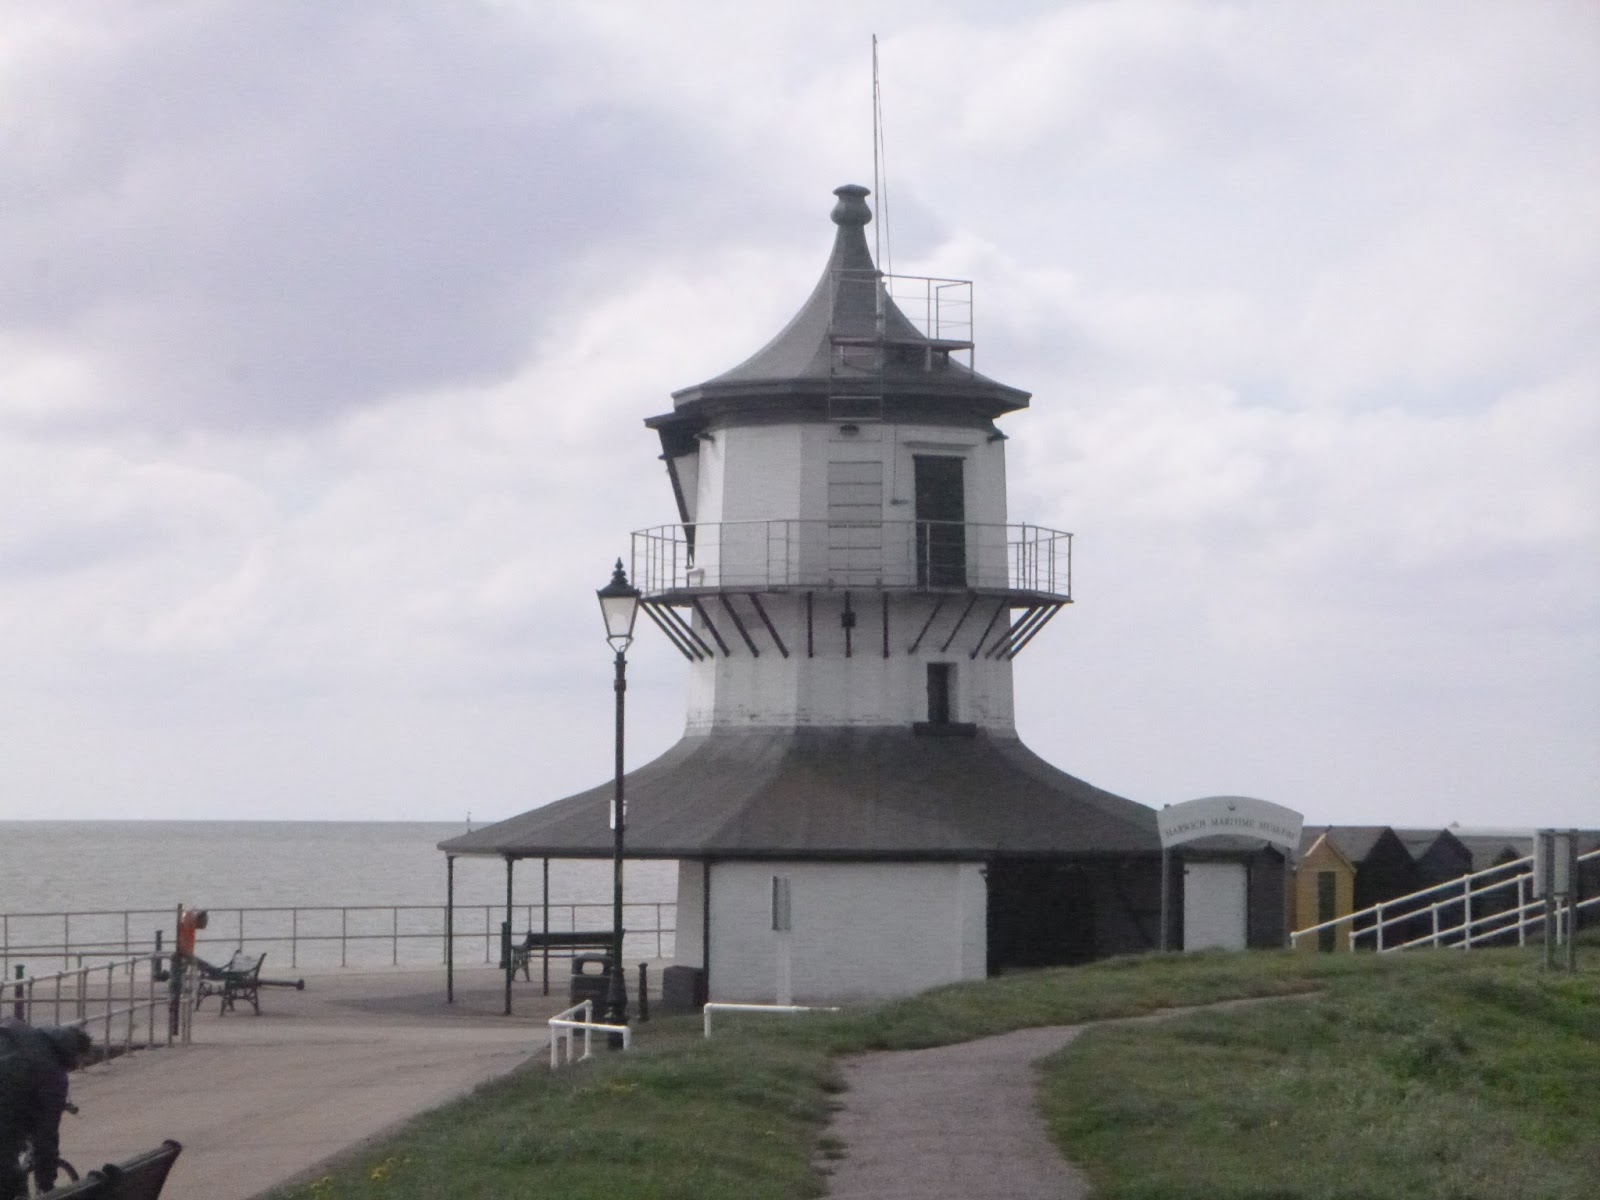
I looked at the train times the day before and decided to catch the 09.04 to Harwich Town, I'd also downloaded the run keeper app to keep track of time and distance and see how accurate my estimations were, with the very basics packed in my bag (waterproof, warm jacket, water, map, penknife, sunscreen, some food, phone, basic first aid kit and emergency charger) I headed down to the station, the local train station is unmanned and doesn`t have a ticket machine meaning that all tickets need to be bought on the train, this is where I scored a massive bonus, the guard never came round meaning a free train ride for me! I arrived at Harwich town just after 9.30 walked to the lighthouse marking the start of the Essex way and set up my phone took a few photos and started walking.

           5 minutes later a heard a voice I wasn`t expecting that was to follow me for the whole walk, it was my phone telling me I'd gone 1/4 of a mile and was averaging one mile in 18 minutes and 25 seconds a good pace equalling about 3 miles an hour or just under 5 km an hour, the first section of the walk took me along Harwich and Dovercourt`s sea front with its various lighthouses and beach huts all along a concreted promenade which after a few minutes in walking boots really started hurting my feet.
Beach Huts


WW2 Gun Emplacement

Lighthouse


 thankfully this didn`t last that long and I was soon onto the dyke that over looked an expanse of marshland and protect the lower lying parts of Dovercourt from flooding. I couldn`t help thinking whether this area was once used by smugglers but given the proximity of Harwich probably not.


It took about an half an hour to cross the marshlands and regain the high ground heading towards Ramsey church, at one time the route took you past the church but now it takes a slightly different route and heads straight for the A120, with this crossed I headed into the village of Ramsey and made for the windmill at the top of the hill. restored on the outside but without sails


after a few kilometres of open farmland I reached the next area of significance, Wrabness woods and specifically Copperas Woods this would lead me back down to the shoreline of the Stour estuary where I would follow it for a few kilometres before heading back up hill and inland past Wrabness church with its temporary (from the 17th century!) bell cage.


Bell Cage


 just after the church the footpath becomes hemmed in by hedges on either side, at least you cant lose you way along this section, after a another short section of farmland the longest sustained uphill section was reached and followed into the village of Bradfield where the major temptation of the day lay, the Strangers Home pub, to have a swift pint or not?

Pint or no pint?

with only a couple of miles left to go I decided not to, after all it would only mess up my timings, more farmland had to be crossed before crossing the final road and heading towards furze hill where my walk would end.

Walks end (for now)

           the walk had covered 12 miles or 19 kilometres and had taken 4 hours 4 minutes giving an average speed of 3 miles or 4.8 kilometres an hour, not a fast pace but not a bad one either based on this and by my rough (very rough) maths I would have to cover 27 miles a day to do the whole route in 3 days, possible but quite tiring which is why I would recommend anyone contemplating doing the route to take 4 days and try to average 20 miles a day, I would recommend anyone thinking of trying long distance footpath walking to start with something like the Essex way as a good introduction, its not too difficult, well signposted and with useable public transport at both ends.
          what would I change? although I had sunscreen with me I would definitely take my hat with as the sunscreen wasn't enough and I still ended up with a sunburnt neck.

Follow the link below to go to the Lone Wolf Mobile Bushcraft website.
www.lwbcfs.com

Sunday, 12 May 2013


Nanok Endurance -10 vs. Mountain Hardwear Lamina 20


Yes it’s another vs. blog; I know I did one last week on the Hilleberg vs. Wild Country tents but thanks to another act of temporary insanity (and some money I’ve been owed for a couple of months!) I’ve ended up with a new sleeping bag but what was wrong with the old one, short answer nothing it was fine, long answer it was too big, too bulky, too heavy, damaged and had missing parts (I’ll explain later) but it was warm. However The new sleeping bag is considerably smaller and lighter as the pictures below show.

                I bought the Nanok about 11 years ago whilst I was at university in the Lake District and was the best bag I could afford at the time and had some novel features including being longer than a standard length sleeping bag, 195 cm as opposed to 180 cm, not that I’m overly tall, zips on both sides rather than just the one side and a removable waterproof bag for boots at the bottom, these features come from the fact that these bag are based on a Norwegian military design, however this didn’t make it totally immune to being damaged as I had lost the waterproof bag and broke the elastic to the shoulder baffle. Good as this bag it has now got the point where replacement is inevitable, much like most equipment which is why I ended up buying the Mountain Hardwear Lamina 20 a sleeping bag I have coveted for some years now.

                Firstly a little background on why I rate Mountain Hardwear so highly, several years ago whilst I was at university, my now ex-girlfriend and I went on an expedition along part of the Pennine Bridleway and the tent we were using was an older Mountain Hardwear which thanks to some drunk people ended up being broken. Without shelter for the next few nights it looked like we would have to abandon the expedition however a call to Mountain Hardwear to see if they would be able to fix the tent yielded surprising results, not only would they be able to fix the tent but they also asked for our next campsite address, when we arrived there was a new tent waiting for us along with a letter essentially saying, use this tent for the rest of your expedition, send both back and we`ll repair your one free of charge, I’ve never known customer service like it before or since and as such have become a loyal Mountain Hardwear customer.

                As I mentioned above I have wanted the Mountain Hardwear Lamina 20 since I first saw it whilst working at Cotswold Outdoors several years ago, it cost a small fortune for a synthetic bag (£90) even then but was and still is worth every single penny, £135 (todays price) buys you what is, in my opinion at least, one of the best synthetic sleeping bags on the market, the first thing to note about this bag is being an American company the 20 in the name means 20® F which is about -7®C, a one sided zip (make sure it’s the correct side for you), shoulder and Face baffles that close fully, and an accessory pocket, the bag also comes with a storage bag for when the bag is not being used which is not that common for a synthetic bag (it is crucial that sleeping bags are not stored in their stuff sacks as this can deteriorate performance) and being 180 cm it feels about the right size when i`m inside, it feel instantly warmer when I got inside and did everything up, this was probably due to the baffles not being broken and that both the shoulders and face baffles can be closed down.

                as you can see in the photos the Lamina is considerably smaller than the endurance yet it only loses 3 degrees in warmth this is due to the filling used, a more or less standard hollowfibre in the Nanok as opposed to the thermal Q ® used in the Lamina which is considerably smaller in size and weight to standard hollowfibre yet still retains warmth.

                In terms of practicality the Nanok does win out over the Mountain Hardwear as it does have the dual zip the boot bag is 3® warmer and has the extra length, however it does lose out to the Lamina in terms of bulk, weight, and pack size. I`ll be keeping both bags for the time being as I do have slight hording tendencies and I’ll be using both until I can bear to part with the Nanok.


Nanok on the left, Lamina on the right


   As with all outdoor equipment personal preference is key to any decision you make.

Follow the link below to go to the Lone Wolf Mobile Bushcraft website.
www.lwbcfs.com

Sunday, 5 May 2013

Hilleberg Akto VS. Wild Country Zephyros 1


Hilleberg Akto vs. Wild Country Zephyros 1  

                I`ve been agonizing over a decision for a little while now and on Friday I finally bit the bullet and bought myself a new one man tent, the Wild Country Zephyros 1, up until recently however I have been using the Hilleberg Akto, so why the change? And how do two compare?

                Firstly why the change, due to using the Hilleberg practically every day whilst working in Australia it received quite a lot of wear and tear, including breaking the pole twice and tearing the fabric a number of times. The reason I didn’t replace like for like was quite simply cost at £425 the Hilleberg Akto is expensive but is worth every single penny however I didn’t have that much to spend and so started looking for a cheaper alternative but of the same quality and similar specifications, a search of the internet produced several alternatives, ranging from the newer version of the Hilleberg through to the cheap (very cheap) Hi Gear Soloista, given the high specifications of the Hilleberg I quickly dismissed anything with less than a 3000 mm hydrostatic head or single skin design as well as 2 pole designs (nothing wrong with 2 poles it`s just personal preference) longitudinal poles or bivvi bags, (yes I’m a gear geek and a gear snob) this left a choice of four tents, the Akto, the Terra Nova Laser comp, another tent I`ve used, the Wild Country Zephyros 1 and 2 and the Jack Wolfskin Gossamer, the Hilleberg Akto was painfully dismissed as was the laser comp for the same reason, the Gossamer was dismissed for being bivvi bag, this left the two Zephyros tents and whilst a little bit of extra room would have been useful it would probably prove to be unnecessary so the Zephyros 1 looked like a sure fire winner, at least on paper, I don’t like buying outdoor equipment online and I don’t recommend it either (unless it’s a direct replacement),  although advertised in the Millets catalogue I know that it is very difficult to get hold of through this company, (I work part time for them), Go Outdoors were also advertising as not only having this tent but having an extra 15% off of it, double win! Or at least I thought, turns out that they hadn`t got either of Zephyros tents in stock. A quick call to the Cotswold Outdoors store 15 miles away not only confirmed they had the tent I wanted but that they would put it to one side for me, a quick drive across to the store and I had the tent I wanted, so how does it compare to the old tent?
    

(Zephyros 1 in local park)
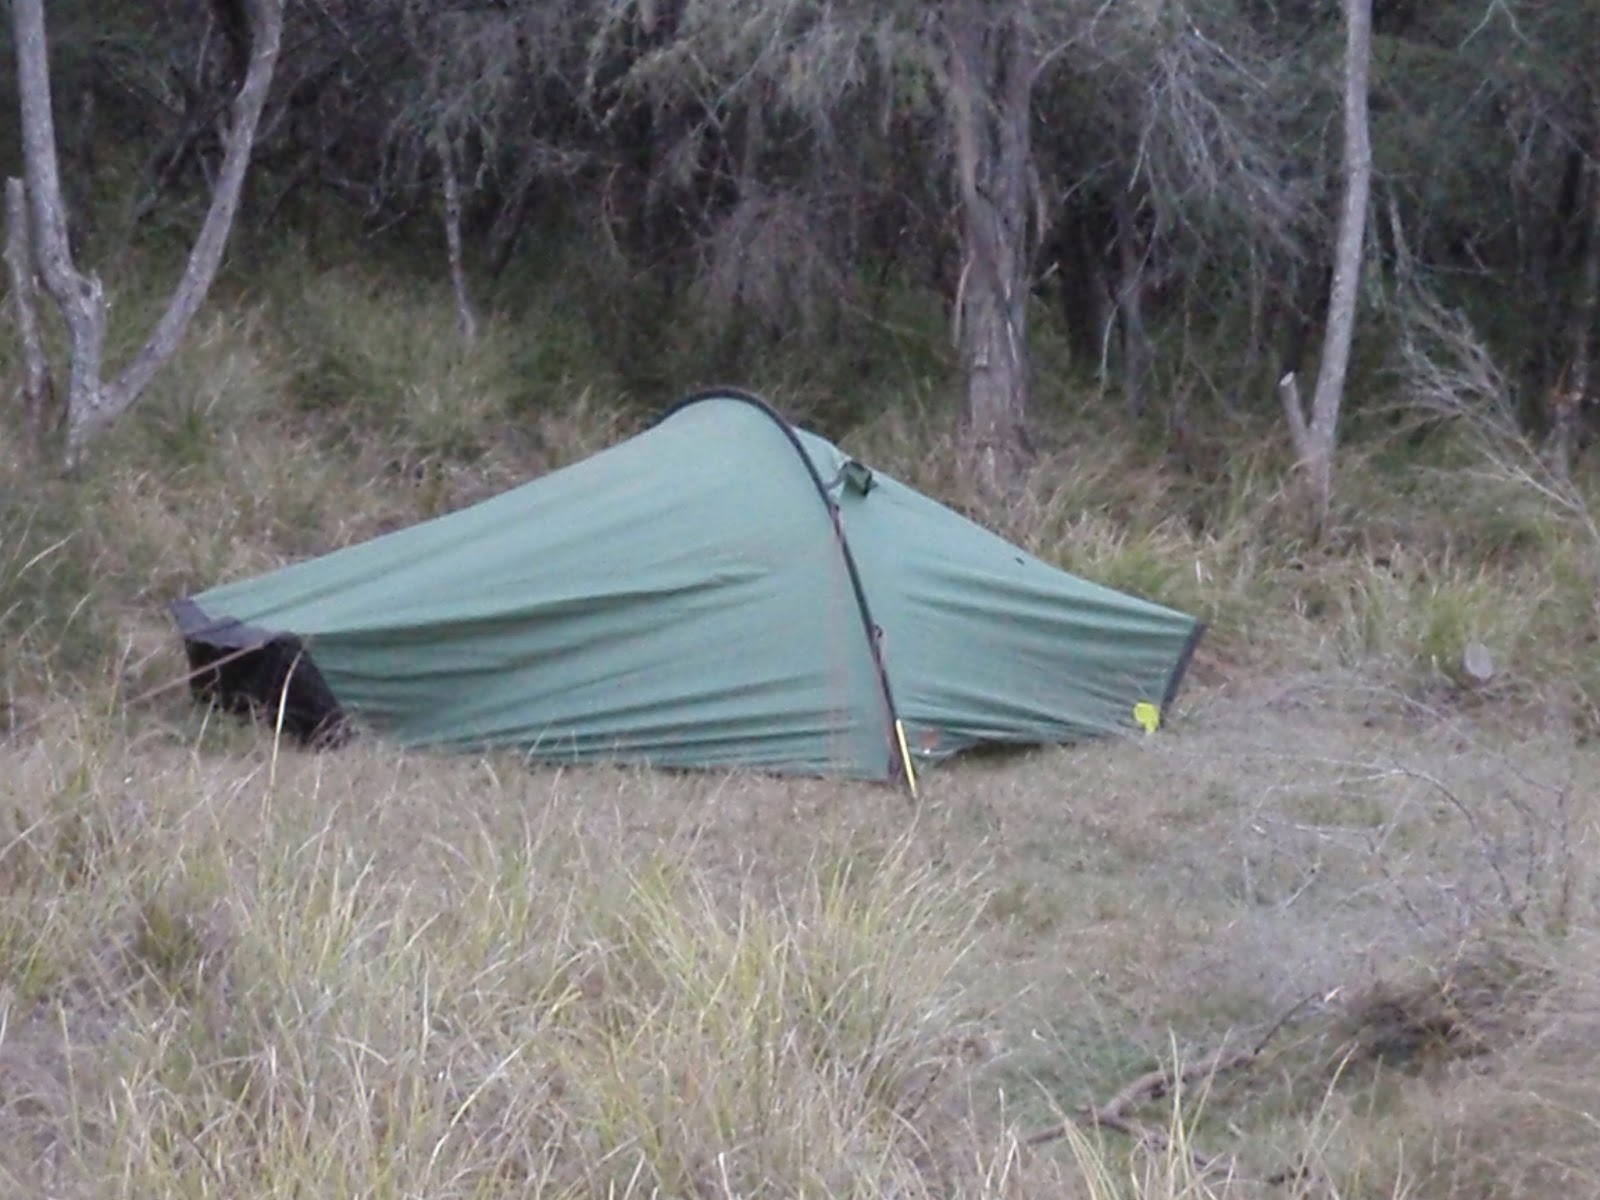
(Akto in Australia)
             
On first impressions the two tents are incredibly similar in design and specifications, both are incredably lightweight, a very small pack size and designed around a tunnel shape, however there are major differences, primarily the way the tents are pegged out, where the Hilleberg uses 2 pegs at each end and a clever guy line system to ensure that correct tension is always supplied to the tent wherever the pegs are placed, the Wild Country uses up to 5 pegs and a conventional guy line system (note: I’ll probably change the pegs as they hurt my hand trying to push them in first time, I didn’t want to bend them if there was something wrong with the tent), out of the two peg and guy line systems used I do prefer the Hilleberg this is because of the way the guy lines work with the Hilleberg in keeping tension through fabric.  the other thing that’s different is the way the pole fits into the tents, in the Hilleberg the pole is made from DAC aluminium and fits in one side of the sleeve only, the other end being sealed with a plastic pocket which the pole sits in, in contrast the Wild Country uses a conventional system of open ended sleeves which is a little bit more useful in putting the tent up as the pole can be pushed through from either side, both systems have their advantages but for ease of use I do prefer the Wild Country.

                Moving to the inside of the tent the first thing I noticed was the fact that the Wild Country didn’t have a bucket or bath tub type ground sheet on the inner tent this could prove problematic in future use but could be overcome by careful pitching, the second thing I noticed is the way the inner is attached to the outer by buckles, different and it`s going to interesting to see how they last in future use, with ventilation holes at both ends of the inner tent there is more flow for air to move through compared to the Hilleberg (at least compared to the one I owned), the Hilleberg uses the more traditional form of loops and toggles to secure the inner to the outer tent. I`m not sure which of these fixings I prefer but I do prefer the deep groundsheet of the Hilleberg because of its better protection.


                Although there are a number of differences between the two tents I am looking forward to using the Zephyros 1 in the future and whilst there are things that I would change about this tent it does compare favourably to the Hilleberg, as a colleague of mine said “it may not be a Hilleberg but you did get it for a quarter of the price”


   As with all outdoor equipment personal preference is key to any decision you make.

Follow the link below to go to the Lone Wolf Mobile Bushcraft website.
www.lwbcfs.com