Sunday, 11 August 2013

Children`s clothing and equipment

Children`s Clothing and Equipment

          Earlier this week I picked up the latest copy of TGO magazine which had a special on going outdoors with your kids, something I would encourage whole heartedly, however one particular article really did make me angry and it was an article on the equipment that the writer recommended for children and whilst it is of course part of a magazine job to recommend equipment there are alternatives to what has been suggested.
          
TGO article 

So what has made me so angry? well quite simply its the price, all the items you see on the page above in total cost £445.50 and thats for only about half the equipment you really need plus the fact that your children will grow out of it at least once a year, now I`m not a parent but even to me this seems a little steep, so what is actually recommended in the article and how much does each item cost? for this I will take full retail price as correct on date of publication.
          
          Kozi Kids technical waterproofs (£55) 
          Keen protection for little feet sandals (£45)
          Fjallraven Kanken rucksack (£50)*
          Camelbak Eddy Kids Bottle (£15)*
          Patagonia Baby Sun Bucket Hat (£23)
          Petzl Tikkina 2 headtorch (£18)*
          Littlelife Cross terrain Child carrier (£150)
          Craghopper Mila Tee (£20)
          Skogstad Down Jacket (£52)
          Pacific Baby Insulated milk bottle (£17.50)

         The items marked with an asterisk don`t have to be exclusively used by children and can be passed on down the line.

          Whilst I would be the first the to admit that the items above are most probably of a better quality can you really justify £400 a year? so what are the alternatives and is it not false economy? well as for the false economy there is an argument for both cases, £400 for quality equipment that will last and you`ll probably only buy once but what happens when your child grows out of those items, you`re straight back to square one and spending another £400. whereas spending less does mean less quality but if your child grows out of the clothing before the jacket is worn out (not including tears or losses) has it not done what it was designed to do?
          As for alternatives there are a few on the market and just for a little bit of fun I`ll set myself a budget of £200 (not including a budget for a child carrier) and see just how much I could potentially get for the money. Again I will take full retail price as correct on date of publication.

Mountain Warehouse

          Mountain Warehouse has a number of waterproofs on offer for children for £60 or less, the one that stands out for me though is the Chuckle jacket at £33.99 and the Spray trousers at £35.99

 Mountainlife Kid's Spray Waterproof Trousers    


          Sandals from Mountain Warehouse look surprisingly like the Teva`s recommended by the writer but cost considerably less at £29.99.

  Mountainlife Kid's Shore Walking Shandals
          A comparable rucksack from Mountain Warehouse in terms of size is the walkabout 12, a 12 litre rucksack which is also hydration system compatible and should be more than enough to carry everything needed for a low level day walk and costs £24.99 


          A water bottle from Mountain Warehouse suitable for children is the 0.3 sports bottle kids with an owl design, although I personally think 0.3 litre is too small for kids and would actually say to go for something slightly bigger. (£7.99)

0.3L Sports Bottle Kids Owl

          £7.99 gets you a comparable hat.

Mountain Warehouse Reversible Kids Bucket Hat

          And £9.99 get you a similar head torch

 Outdoor Essentials 5 LED Head Torch
          The Talus base layer is the closest Mountain Warehouse make to the Craghoppers base layer but of course is much cheaper at £16.99 (this is for the short sleeve which I could only find in white)

Mountain Warehouse Talus Kid's Short Sleeved Round Neck Top

          As for the insulated jacket Mountain Warehouse stock the Khuno jacket which although is a pure synthetic jacket still represents good value for money, the other bonus to this jacket is being a synthetic jacket is more hard wearing and durable and less susceptible to water damage.

 Kid's Khuno Padded Jacket

          Total spend at Mountain Warehouse £207.91

Millets/Blacks

          whilst I am not the biggest fan of the Peter Storm Adult range when it comes to the childrens range I do recommend it, as it usually represents good value for money, is robust and has a wide range of sizes from 3/4 years old right through to extra small and small in adults.
          THE KIT Boys waterproof jacket retails at £30 and is very good value at this price, being waterproof, breathable and having an interactive zip as well,


the torrent waterproof trousers complement the jacket and are fully waterproof as well. (£10)


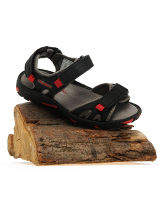
          the Troos sandals although not offering the same toe protection as the Keen Sandals are a decent pair of sandals that provide excellent grip in the wet and are made from a water repellent material improving the life of these sandals. (£20)

Boy's Troose Sandals


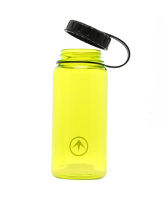
          Although Millets/Blacks don`t do a specific kids water bottle (with the exception of the Camelbak bottle) any water bottle can be used for the purpose as long as its big enough, about half a litre and the 0.75 litre water bottle fits this perfectly, being made for tough plastic its unlikely to break and will fit quite happily in most side pouches of a rucksack, you could probably decorate the outside to make each bottle individual as well if you needed to. (£8)

0.75L Plastic Bottle
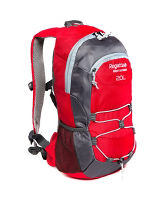
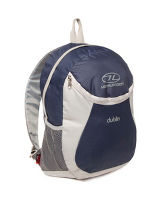
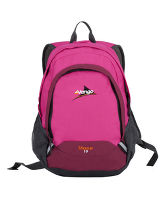
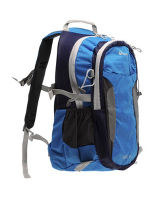
          Again Millets/Blacks don`t make specific bags for children but there are a few within the range that can be used by them all with various different features and using bright colours that kids like, the four that I have chosen are no bigger than 20 litres and cost no more than £25

Axten 20L Daypack
Regatta Axten 20L (£20)

Dublin 15L Daysack
Highlander 15L (£9)

10 Litre Stone Daysack
Vango 10L stone (£15) also available in blue

BLKS Sonic 18 Mid Blue 0
Blacks Sonic 18L (£25)

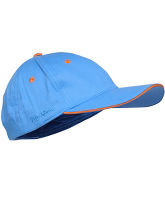
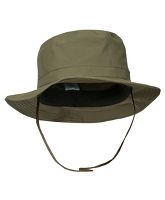
          Hats are included in the Peter Storm Kids range and come a variety of different guises, from standard caps through to mini river ranger hats and prices from £5 to £12 


Boy's Texas Baseball Cap
Mini River Ranger Hat

          Again each of these hats has a different advantages and disadvantages to them and ultimately the choice is yours.
          Ironically the cheapest headtorch I could find was the Tikkina 2 by petzl at £20
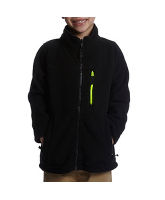
          Unfortunatly Millets/Blacks don`t stock Kids Technical T shirts, they do however stock a wide range of insulated jackets and fleeces, as mentioned above THE KIT boys fleece is interactive with the jacket and forms an extra thick and bulky jacket when put together, (£15)
Boy's Fleece
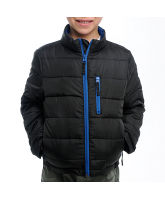
          The insulated jackets are not interactive but some are packable and they are made from synthetic material meaning increased durability and resistance to the damp. prices start from £20 for a full jacket

Boy's Packable Insulated Jacket

Total spend at MIllets/Blacks £125 (£145 including Tikkina 2)

Go Outdoors

          As one of the UK`s biggest outdoor suppliers Go Outdoors would naturally have a wide range of children`s clothing and equipment at a reasonable price, this prices here are full and do not take into account the discount card.

           The Hi Gear Rainpod Jacket retails at £15.99 and like the other jackets mentioned in this blog is fully waterproof and breathable, it isn`t however interactive.


Black
          To complement the jacket Hi Gear offer the Stowaway Children`s overtrousers at £25 and whilst these are fully waterproof they are not breathable which is something you will need to consider


          Go Outdoors stock the usual array of brands when it comes to Kids footwear and are all priced within the same price range of £20-£30, the example shown below are the Freedom Trail Fabric Sandals which retail at £20.

          Go Outdoors do not stock specific children`s water bottles and the cheapest bottle I can find is the Camelbak Podium at £8.99


          There are nine childrens rucksacks on offer at Go Outdoors ranging in price from £10.99 through to £24.99, the one I have chosen below is the Hi Gear Champ 10 at £10.99, with 10 litres of storage capacity within multiple pockets. 


Champ 10 Children's Daysack


          Once again when it comes to sunhats Go Outdoors has a wide range to choose from ranging from £4.99 to £18, the majority of them are based on legionnaire style caps. the one below cost £8


          where Go Outdoors really excels in kids clothing is with the amount of fleeces on offer, with separate sections for lightweight, mid weight and heavyweight fleeces (which also includes down and synthetic down jackets) prices start from £10 for a basic micro fleece and go up to £40 for an padded gilet, the microfleece below is a simple crew neck but could be used to teach the layering system

Black 

Total spend at Go Outdoors, £122.97

          As can be seen it is possible to equip your children for considerably less than £400 with the same equipment in the article (not including child carrier) normally at this point I would say As with all outdoor equipment personal preference is key to any decision you make, however in this case pester power will probably mean you end up with the prettiest one or the coolest one. 

Follow the link below to go to the Lone Wolf Mobile Bushcraft website.
www.lwbcfs.com

Saturday, 3 August 2013

Basic fire lighting methods

Basic Fire Lighting Methods

Fire, a basic necessity for thousands of years and one of the first things that a bushcraft course should teach. Its a pity that this most fundamental skill has been lost with the advent of self igniting boilers and central heating to keep us warm. There are many different ways of teaching fire lighting ranging from the basic and obvious through to what most people think of when they think of bushcraft, rubbing two sticks together. in this weeks blog I`m going to show you some basic and simple methods of fire lighting that I teach on my courses, I made the videos in the local woods, the footage is unedited as I don`t have a video editor on my computer, I used cotton wool and petroleum jelly as fuel and all the fires are extinguished using a bowl of water which you will occasionally hear.

  
the kit 

Matches

Matches have been around for a long time yet it is still surprising how many people aren`t confident in using them, especially young people, personally I blame films for this as many people have seen an actor light a match only to drop seconds later just before the monster attacks! this has lead me to start doing confidence building with matches where I take an extra long match light it and hold it in my hand whilst explaining that it takes a while for a match to burn down to their fingers and in all likelihood will probably burn out before it even gets there.


(the T-shirt should read Lone Wolf Mobile Bushcraft)

this is what tends to happen with clients 


Lighters

probably most peoples first port of call when they think of a way to light a fire as everyone knows someone that will have one, I have both a long handle refillable lighter and the usual disposable ones, I do encourage the use of both, the videos below show both types and yes I did have a problem with the disposable lighter until I swapped hands.


Disposable lighter


Fire Striker

For most people this is where bushcraft really begins in terms of fire lighting, as there is skill and patience involved with getting a spark from one of these, I have found that the best way to use a fire striker is to keep the steel still and move the striker itself as this means that sparks generated are at a consistent distance and are slightly easy to control in terms of direction, although this is by no means assured and many a decent spark has been lost due to random direction, I have also found that better sparks are generated when using a knife this however does have the downside of blunting the knife.


Battery

This is perhaps one of the easiest non conventional methods of lighting fires out there, however it does have downsides which I will go through first, first of all this method can be dangerous for many reasons, to light a fire, you are effectively creating a short circuit between the two terminals of a 9V battery with some wire wool, this runs the risk of electrocution and burns if you touch the energized wire and also heats the battery itself to quite a high temperature, if you intend to try this method please only do so whilst wearing gloves and DO NOT hold the battery against the wire too long else you will risk the battery catching alight, I use cheaper batteries for this method as they are not used for long and get damaged anyway, also when transporting battery and wire wool I not only wrap the battery in a non conductive material, like a plastic bag but also store the two in completely separate compartments of my rucksack. 


This covers four basic methods of lighting fires but there are many more I haven`t covered such as traditional flint and steel, focal point ignition (magnifying glasses and parabolic mirrors) and fire pistons (I don`t own one of theses yet), as well as bow drills and fire drills (rubbing two sticks together) as these are better taught on courses, if you have a go at any of these methods above please remember safety precautions and always have a method of extinguishing fires afterwards.  

Follow the link below to go to the Lone Wolf Mobile Bushcraft website.

Sunday, 28 July 2013

Superfeet Insoles

Superfeet Insoles

          Last week I noticed that the soles of my shoes had worn away quite alarmingly on the outside edge of the heel and whilst this normally wouldn`t be a problem and is the way that most shoes should wear (outside heel to big toe) it shouldn`t have worn so quickly in shoes less than a year old, I figured that this must be happening due to the amount I wear the shoes, combined with a collapsed arch and heavy gait.


          Although I`ve known for a while that I needed some sort of support underfoot (especially after the last major walk I did where I ended up with a very sore knee and hip)  I decided it was time to finally get some of these insoles.
         The Superfeet insoles have been around for a number of years and have had some remarkable success stories, including one gentleman who walked from the Falkland Islands back to the UK using them in his boots so surely they would work for me. Having already worked with Superfeet insoles in one of my previous jobs in an outdoor retailers I was familiar with their products already and knew the insole I would require, the blue ones for approach style shoes, (I would also be using them in my mid boots as well) they do come in a variety of colours, blue, green, orange and pink, but this is NOT for looks, each colour means a different thing, usually the style of footwear they are designed to fit and the amount of support they give, there are also black versions but these are custom fitted to indivdual feet.
          As these insoles are designed to fit to your heel as apposed to the shoe they need to be fitted properly, ideally cupping the heel and preventing the fat pad under it from thinning out, as such these insoles ideally need to be bought from a shop rather than online as an adviser not only needs to fit them to your foot but also grind the edges to an angle to fit in the bottom of the footwear.


          Superfeet slowly realign the feet into a neutral position (despite not technically or legally being a corrective insole) meaning greater comfort and easier walking over longer distances and possibly helping with joint problems, they do need breaking in though same as a pair of boots and this unfortunately does mean some pain and discomfort for the first couple of weeks and for that reason it isn`t recommended to wear the insoles for more than about two hours each day for the first week, everyone experiences a different type of pain but the most common is the feeling of a pebble under the arch, other experiences include some joint discomfort or pinching under the heel, personally I only experienced the pebble feeling, so this has probably begged the questions, do they work? and are they worth it? 
          The answer to the first question is yes they do, since I`ve been using them my stride has changed, my pace has quickened and the pain I experienced in my hip has gone so yes I think they do work but I`ll leave that decision up to you. Are they worth it? again that decision I`ll leave up to you but I think for £35 a pair they represent superb value for money because of the amount of time they would be used for and even if they help out only a small amount wouldn`t it be worth at least trying? best of all if they really don`t help Superfeet do offer a money back guarantee.
          I do kick myself for not getting a pair of Superfeet sooner and I really would recommend at least trying them for a little while.

As with all outdoor equipment personal preference is key to any decision you make.

Follow the link below to go to the Lone Wolf Mobile Bushcraft website.
www.lwbcfs.com


Sunday, 21 July 2013

useful travel accessories

Useful Travel Accessories

There are a large number of accessories designed for the traveler on the market, below I have listed the accessories I would always recommend and why I recommend them. as usual the choice you make is always yours

power adapter

This may seem like an obvious one to begin with however it is surprising how many people forget these until the last minute, the first thing to mention about these is that few if any are earthed, this means that any current passing through needs to be low to avoid tripping circuits, it is worth doing some basic research into the country you`re traveling to to find out the type of power outlet used, the most common being, European 2 pin, American 2 pin, Australian 2 pin and UK 3 pin.  

travel plug

There can be times when in a hostel or other places where the sinks may having missing plugs or may not have had them to begin with and stuffing paper towels into the hole can only work for so long, luckily one of these plugs will save you having to do that, but they don`t usually come with a chain so don`t forget it when you leave.

washing line

There will be times when you`re traveling that you`ll have access to washing machines or a sink for the same purpose but not necessarily a washing line to dry your clothes on and there are specific lines made for travelers which don`t use pegs, these lines are twisted bungees that grip clothes between them, it is however quite short and this must kept in mind.

first aid kit

A first aid kit should be included in anybody`s kit when they travel overseas, however something that should also be included is a sterile needle kit and if possible a sterile dental kit as well,

water purification 

Any form of water purification is better than none as one of the popular tricks used in some countries is to fill used water bottles with tap water and re-glue the lid to make it appear that the bottle is new, see the blog from last week to see further details.

Mosquito repellent 

Once again there are many alternatives to choose from in this category, these include DEET citronella, and even Avon`s Skin So Soft, DEET comes in 50% and 100% strength, DEET is chemically based and therefore if its possible should be tested on your skin for any allergic reaction, the other thing that you should be aware of with DEET is that it has a slight tendency to melt synthetic clothing, a more natural alternative is of course Avon Skin So Soft but it can obviously be difficult to get hold of.
          another item that can be used is not a repellent but can provide lot of relief if you are bitten  is a bite relief clicker, this provides a short electrical jolt to area to take away the swelling and the itching.
  
Travel towel

these are towels specifically designed for traveling they pack up incredibly small and dry very quickly, they do come a variety of sizes ranging from small through to giant. 

Pac-safe

Although this piece of equipment will make you stand out while your traveling it will make the equipment in your pack safer, this is a flexible metal cage that fits over your pack and resists almost any attempt to break into it, on the downsides however it is heavy and as mentioned above does make you stand out.

2 more pieces of equipment that I would recommend although you probably wouldn`t find it on many kit lists are, a "muggers wallet" and a "muggers phone" these are what they sound like an old wallet, with the lowest denomination of paper money and a few of the local coins as well as some old credit cards inside, the phone is either one of your old handsets or the cheapest ones you can find on the market. if the worst should happen you hand over these rather than your actual wallet and phone.  

Follow the link below to go to the Lone Wolf Mobile Bushcraft website.

Wednesday, 17 July 2013

Steri Pen

Steri-Pen 
          I`ve been aware of these for quite a while now but never really had the desire to buy one, until a couple of months ago when Trail magazine offered a free one when people took out a subscription to the magazine which at £50 for 13 editions worked out a lot cheaper than the £67 asked for just the steri-pen itself, even though I do prefer reading TGO magazine I took out the subscription and began the long wait for the device to arrive. How do these devices compare to other methods of water purification though?


          More traditional forms of water purification include chlorine, chlorine dioxide and for those of us lucky enough to remember it iodine, as well as various filters and while these worked they did have they`re various downsides, chlorine doesn`t kill off all the bacteria present in water and leaves a nasty taste behind, unless you use neutralising tablets, iodine kills off more but not only leaves a nasty taste behind but has a tendency to stain everything it touches which then leaves you questioning what your guts look like, although ironically you do get used to the taste and notice it when its gone, they are however easier to get hold off, with the exception of iodine, don't require batteries to work, take up much less space, weigh less and can purify more than one litre at once, although this does have another downside in that there is a period of time to wait for the chemicals to work, anything from half an hour to three hours depending on the chemical and the amount of water that's being purified (add extra time for neutralising tablets).


          Another method of purifying water is through the use of filters such as the Katadyn filters, these work by filtering bacteria from water and without bacteria viruses can not survive, depending on which one you buy will depend on what you get from the filter, some of these filter water quicker but at the cost of having less life, others can filter a lot more water (up to 50,000 litres) but are heavier, more complicated to use and require more maintenance and others are smaller and lighter but take longer to work, the major advantages of filters however is the ability to fit any bottle type, the far greater capacity to purify water and the total absence of electrical power, the major downside is the relative cost of the unit, these filters range in price from £115 to £300 with spare filters and silicone gel sold separately.


          The Steri-pen uses a pre filter to extract dirt particles and then ultraviolet light to break down the DNA structure of the bacteria within water and takes a surprisingly short time to do so, this major advantage means that there is a very short waiting time between collecting water and being able to drink, there is no calculating chemical to volume ratio involved and no aftertaste. it is however limited to the amount of water it can purify, generally one litre at a time, this is a small price to pay though considering how quickly that one litre is done. one other disadvantage to the Steri-pen is that it runs off batteries which are usually 4x AA (which in personal terms means I now have to carry two types of spare battery rather than just AAA) but to make matters a little more complicated Steri-pens work best with Nickel-Metal-hydride (NiMH) batteries, which are naturally more expensive but on the plus side are generally rechargeable. side note; I picked up a rechargeable unit and 4 batteries at my local supermarket for £16 (yeah I know it makes it the same price as buying from a shop, but I still would have needed to buy the batteries anyway), the biggest disadvantage to the Steri-pen however is purely psychological, it may just be me but because I can`t see anything changing or fizzing or taste anything after drinking I`m constantly thinking "has it actually worked?" of course Steri-pens wouldn't be on the market if they didn't work but there is something reassuring about seeing water change colour as iodine works, further use of this new piece of equipment is really going to be needed before I can trust it fully.
          As a further comparison Camelbak also make there own version of a ultraviolet light bottle the advantage of which it has an in built rechargeable battery and a countdown timer but on the downside cannot be used in any other bottle.
          With any overseas expedition or extended expedition in the UK the need for clean water becomes paramount and all the methods mentioned above are all effective the one you choose of course is entirely yours.

As with all outdoor equipment personal preference is key to any decision you make.

Follow the link below to go to the Lone Wolf Mobile Bushcraft website.
www.lwbcfs.com

Sunday, 7 July 2013

Penny Stove (AKA Toucan stove)

Toucan Stove(AKA penny stove)
I`ve mentioned these stoves in previous blogs, simple, homemade and very lightweight and there are plenty of videos online on how to make these but this is the way I make mine. I only use two tools, a craft knife as it makes a cleaner cut and a multi tool, drills can also be used but are more or less optional and I tend not to use them.


the only other things required are 2 fizzy drink cans, hence the name. the first step is to rest the knife on something in this case I have used a notebook but it doesn't really matter what you use, you then turn the bottom of the can against the blade of the knife without using much force to score and eventually cut through the metal, even when a cut eventually appears in the metal don't force the cut as it will buckle the metal.


before the bottom of the second can is cut off its a good idea to cut the required holes into the can as it becomes more difficult afterwards. there is one main hole to fill the stove up with methylated spirits and 16 holes around the edge of the can, I`ve found the best thing to is to put these holes on the shoulder of the can as this is where the metal is slightly thicker and is just about the right place to get the most heat from the flame without restricting the oxygen, I`ve also found through experimentation that having 2 rows of 8 holes at slightly different heights works better, I`m sure there is a scientific reason as to why this is but I have no idea, word of caution metal burrs will probably be created during this process, so be careful afterwards or use the file on the multi tool to smooth the burrs down.


after both cans have been prepared, the bottom half of the stove must be crimped slightly with the pliers from the multi tool so that it fits within the top half, this is possibly the hardest part of this build to get right and takes a little skill to perfect, too much will result in gaps and too little will result in one half of the stove splitting.


once this is done a decision has to be made about whether to use a wick or not on the inside, again through experimentation I`ve found the best wick to be glass wool/fibre although this can obviously be expensive if only making the one stove, the wick I used in this stove was an old cotton tea towel, again an experiment so i don't know how it will turn out.


regardless of whether you use a wick or not the two halves of the stove now need to be pushed gently together.


the only thing required to finish this stove is to place a coin over the centre hole to seal it when the stove has been filled with meths, hence the more common name for this stove. there are however a couple of things that can be done to refine this stove a little further.
          As this stove has to be primed before it can be used properly it makes sense to have a priming pan and for this I use the lid of a tin can which has been taken off using a side cutting tin opener which leaves a rim around the edge to hold a very small amount of meths in.


something else I have found through experimentation is that these stoves don't really work properly until they have been used a couple of times so I always burn a full fill of meths at least twice before I start using these in the field.


 depending on how deep you make these stoves will depend on how long they last, the stove I have made here should last approximately 35 minutes on one fill.
          As with most things there are alternatives using the same design, one of the main design differences is, rather than having the flame holes on the outside they can be placed on the inside of the supporting ring, this creates a more intense and hotter flame but does have the disadvantage of requiring a separate pot stand.


20130705_175147.jpg


a further development uses just one can and ends up looking very similar to a Trangia burner, this however requires more tools, measuring and cutting and I found it didn't work anywhere near as effectively, this doesn`t mean you shouldn`t give it go however, it may work better for you than me.


another development of these types of stoves use metal beer bottles but as these are relatively rare in the UK it can be an expensive option and I have only managed to create one of these stoves which works well but I don't use it very often as it would be nearly impossible to replace if anything happened to it and as I always say with equipment personal preference is key to your decisions

Follow the link below to go to the Lone Wolf Mobile Bushcraft website.